How to create a pallet wall
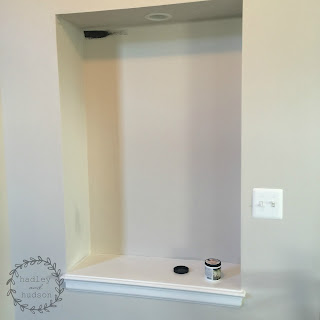
When we first moved into our home a little over two years ago, I knew that I wanted a pallet wall somewhere. This sweet little nook had so much potential and I just wasn't sure what I wanted to do with it. I thought about painting it an accent color but wasn't sure which one, so in true fashion, I decided to just do, well, nothing.
The place I knew with 100% certainty that I wanted to do a pallet wall was the back wall of our half bath. Our half bath was small, cute, and simple but it needed a little something to spice it up. I researched where to get pallets, or pallet-style wood, etc. One day, while in the trenches of potty training I looked up and realized that the wall behind the toilet was in fact very crooked. If we put wood up there, we may wind up accentuating the slant in the wall and neither of us wanted that.
Then, the lightbulb went off! What if we put the pallet wood in the of the nook? I kind of wanted to use that area as a little test to see if my husband and I had the necessary skills to pull it off. Would it be hard to cut and make it straight? I felt like by mastering that little space, it would open the door to larger walls (possibly in the basement or one of the boys' rooms).
Once we were serious, we began to figure out what type of wood we wanted to use. The space is not super wide so thick wood would take up precious real estate. My husband was worried that if we picked up some random pallets on the street that we would also pick up mold, or bugs. I found some companies that made slim wood that you could stick on the walls but was less than thrilled with the price tag.
I found some thin wood that I thought would work but when it showed up it was not the natural look we were going for but rather it looked like we were sticking laminate to our walls. Since that wasn't what we were going for, back it went.
 |
| This was the original wood I purchased. It was a great product and very well made, it just wasn't the right look for us. |
Finally, I stumbled across East Coast Rustic. They had the color, width, height we wanted and most importantly the price point we wanted!
 |
| This wood from East Coast Rustic is absolute perfection! |
The box contained various lengths and colors. I searched Pinterest to find tutorials for how to create pallet walls and came across a number of awesome ones!
Take a peek at my favorites:
Cape 27 Blog
Studio Gray House
99 Pallets
Based off of those tutorials, these are the steps we took.
MATERIALS:
- Rustic wood from your favorite source (see step 1 to see how to calculate how much wood you'll need)
- Sample can of black paint
- Painters tape
- Paint brush
- Liquid nails
- Level
- Miter saw
- Rubber mallet (optional because we thought we would need it and we did not)
1. We measured our space and used this handy square foot calculator to figure out how much wood we needed. Since the pieces we ordered came in a number of shapes and sizes, we ordered 3 additional square feet to account for errors, color variations, and possible cracked/imperfect pieces. We are so glad we added the extra square feet because at the end of our project, we literally did not have a piece to spare!
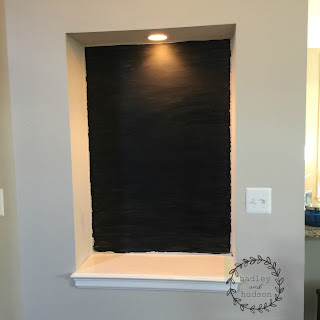
2. First, we painted the back part of the wall black so if there were any spaces between the wood pieces, the gray paint that was currently on the wall would not show through. Make sure you use painter's tape to tape off areas that you don't want painted black. The Home Depot sells great little sample cans that are very inexpensive and can be custom mixed to any color!
I would suggest this step for any wood wall project because it really helped! Wood is such a beautiful, imperfect material so spaces are bound to happen (they definitely did in our case).
3. While the paint was drying, we decided to lay out a mock wall on the floor. Our pieces were various shades of gray and brown and we wanted to make sure we didn't put too many like pieces next to each other. I know that this step may be harder for larger projects, but I really think that it is an important step.
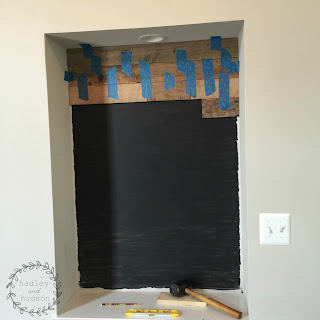
4. For our wall, we decided to start from the top down. We knew the top part of the wall would be a focal point since it is very clearly visible when you enter our main hallway. Some wood pieces come with special tape on the back to adhere it to the wall. Our pieces did not have tape, which really wasn't a deal breaker for us. We decided for a project this small and with the type of wood that we were using that we would just use liquid nails to adhere our pieces to the wall.
5. Once you have decided on the pattern, it is time to begin the tedious process of measuring and cutting! We tried our best to place a level under the row once it was completed to make sure it was level. A project like this can drive you a little bit crazy because most homes have imperfections and are not perfectly straight and wood is always so beautifully imperfect and also not perfectly straight . We used our level as often as we could but honestly, most of it was trusting our eyes and making sure that we liked what we saw. The wood we purchased was super easy to cut on the miter saw and made that part of the process a breeze.
We placed the wood in a pattern of long pieces mixed with shorter pieces. We put a decent stripe of glue on the back of each piece. You don't want so much glue that it oozes out but you don't want such a little amount that it won't stick. We used a really professional method we call the shimmy and shake. We'd put a stripe of glue, place the wood on the wall and shimmy it around a little to move the glue around and voila!
After we placed a few pieces, we placed painter's tape over the wood just to try to keep it from sliding down the wall. With the wood we used, this luckily wasn't a huge problem because the wood was so light weight that it did not slide.
6. After all of the wood pieces were on the wall, we went back through and re-pressed all of the wood to make sure they were as stuck as they could be. We left the painter's tape up for the night while the glue cured.
We really, really love this little nook and love the dimension that it has given the wall!


Comments
Post a Comment